


: Hunter unbeatable & FULL RACE VIDEOS + results!!!")
: Press Day, first laps, standings – Interviews!")


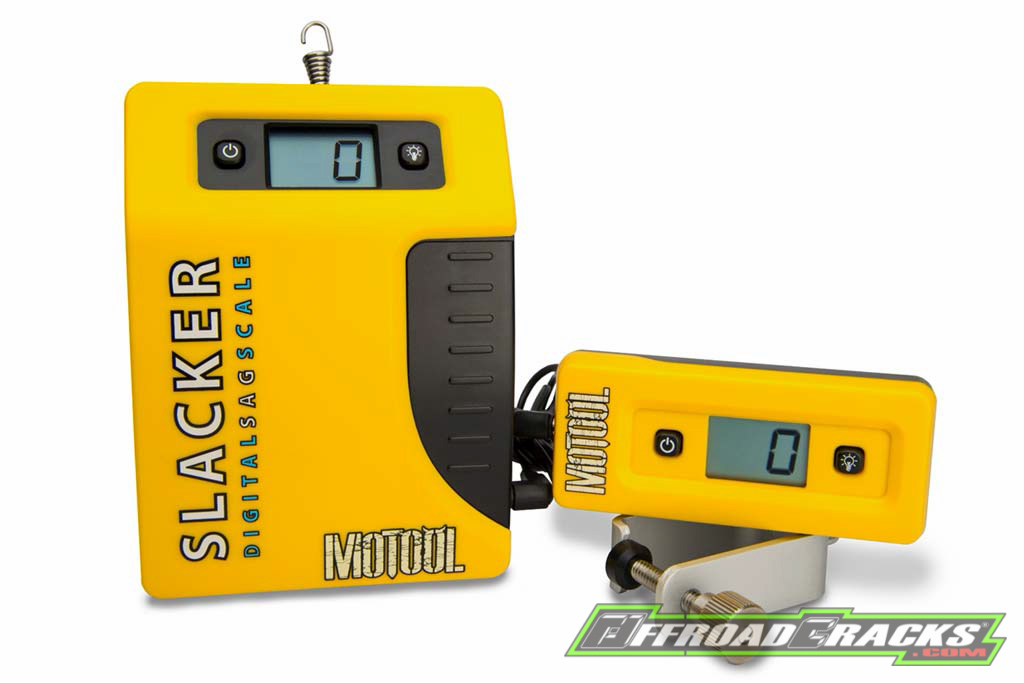
![]() Wer wünscht sich nicht beim Messen und Einstellen des Negativ-Federwegs zwei weitere Hände? Hier die Lösung von Motool aus Kalifornien.
Wer wünscht sich nicht beim Messen und Einstellen des Negativ-Federwegs zwei weitere Hände? Hier die Lösung von Motool aus Kalifornien.
Egal ob großvolumige Reiseenduro oder Sportenduro. Für den richtigen Fahrspaß sorgt nur ein passend eingestelltes Fahrwerk. Das bedeutet letztendlich nicht nur das Einstellen von Zug- und Druckdämpfung an Gabel und Federbein, sondern einen korrekten Negativ-Federweg. Der am Vorderrad ist natürlich auch nicht unwichtig, was aber meist mit innenliegenden Veränderung mittels Vorspannhülsen und Co realisiert werden muss, sollte keine umfangreiche Verstellung über vorhandene Preload-Adjuster von außen möglich sein.
Deshalb konzentrieren wir uns hier hauptsächlich auf die Einstellung des Federbeins, der damit notwendigen Federvorspannung und dem daraus resultierenden Negativ-Federweg, der umgangssprachlich als Durchhang bekannt ist.
Vor dieser Prüf- und Einstellarbeit ist sicherzustellen, dass die Lagerung der Federbein-Anlenkpunkte sowie der progressiven Hebelumlenkung korrekt funktionieren. Das bedeutet, dass die Lager nicht festkorrodiert noch schwergängig sind. Alles sollte gut eingefettet sein, um eine korrekte Funktion, Messung und Einstellung gewährleisten zu können.
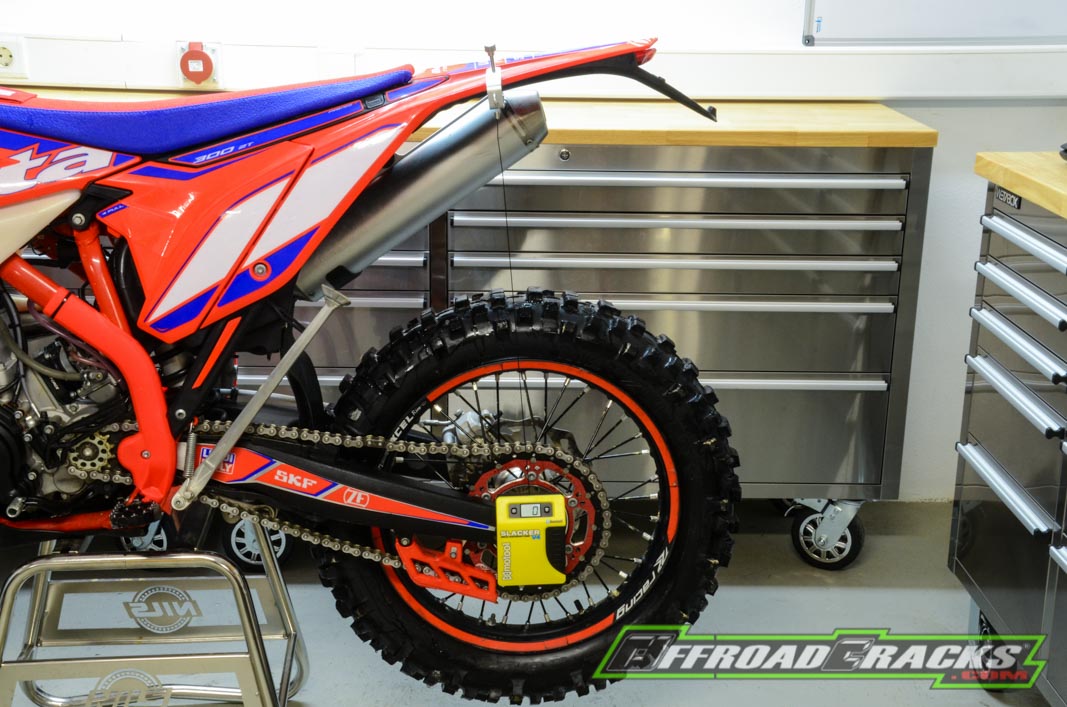
Zur Begriffserklärung: Der Negativfederweg beschreibt die Distanz zwischen Motorradheck und Schwinge jeweils in belasteten und unbelasteten Zustand. Bei voll ausgefedertem Federbein – die Enduro steht auf dem Haupt- oder separaten Hubständer – wird der maximale Abstand bestimmt. Hierbei gilt es in der Senkrechten zwischen einem Punkt an der Schwinge und am Fahrzeugheck den Abstand zu messen. Hierfür empfehlen sich die Mitte der Hinterradachse, sowie ein Punkt am Fahrzeugheck wie im unten stehenden Bild angezeigt.
Als zweite Messung ist der Negativfederweg durch das Eigengewicht der Enduro zu bestimmen. Das bedeutet, dass die Enduro auf beiden Rädern steht und die Messung über identische Punkte erneut vollzogen wird. Die dritte wichtige Messung ist bei voller Belastung durch den Fahrer mit Ausrüstung durchzuführen. Das heißt, dass neben dem Fahrzeug-Eigengewicht unter gleichen Bedingungen die Enduro mit dem Fahrer sitzend und den Füßen auf den Fußrasten belastet wird, so dass erneut die Messung an identischen Punkten vorgenommen werden kann.
Die Differenz aus erster und zweiter Messung ergibt den Negativ-Federweg unbelastet und die Differenz aus erster und dritter Messung den belasteten Negativ-Federweg.
Damit man die dritte Messung überhaupt klassisch mit einem Meterstab durchführen kann, benötigt man normalerweise zwei weitere Hände, sollte man selbst auf der Enduro sitzen. Und hierfür kommt der patentierte Slacker V4 von Motool in Spiel, der übrigens von vielen Werksteams eingesetzt wird. Denn er ersetzt quasi die zusätzlich notwendigen Hände durch eine helfende Person via digitale Messeinheit samt Bluetooth Übertragung auf ein externes Display am Lenker oder dem Smartphone per kostenloser Motool-App.
Somit lässt sich relativ schnell und einfach der Negativ-Federweg für die jeweiligen Bedingungen prüfen und notfalls anpassen, was in den Bedienungshandbüchern der Hersteller mit expliziten Einstellwerten beschrieben wird. Gleichzeitig kann über diese Messungen auch festgestellt werden, ob die montierte Federrate für das Fahrergewicht und bei Reiseenduro plus Zusatzgewicht anhand der Herstellervorgaben ausreicht oder nicht.
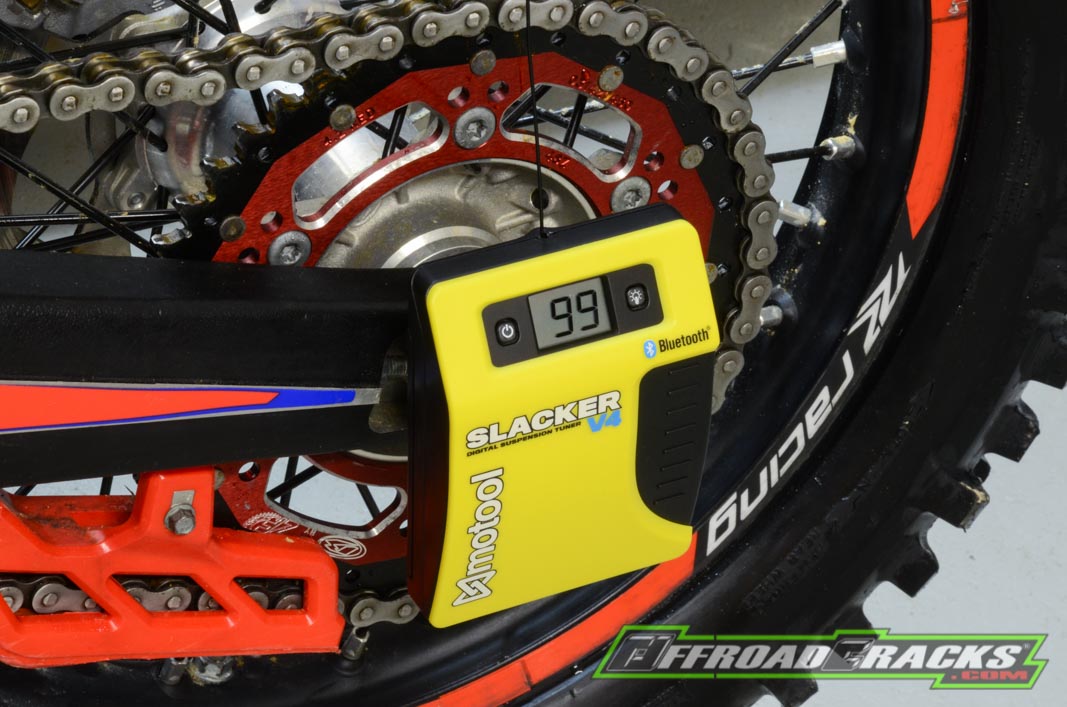
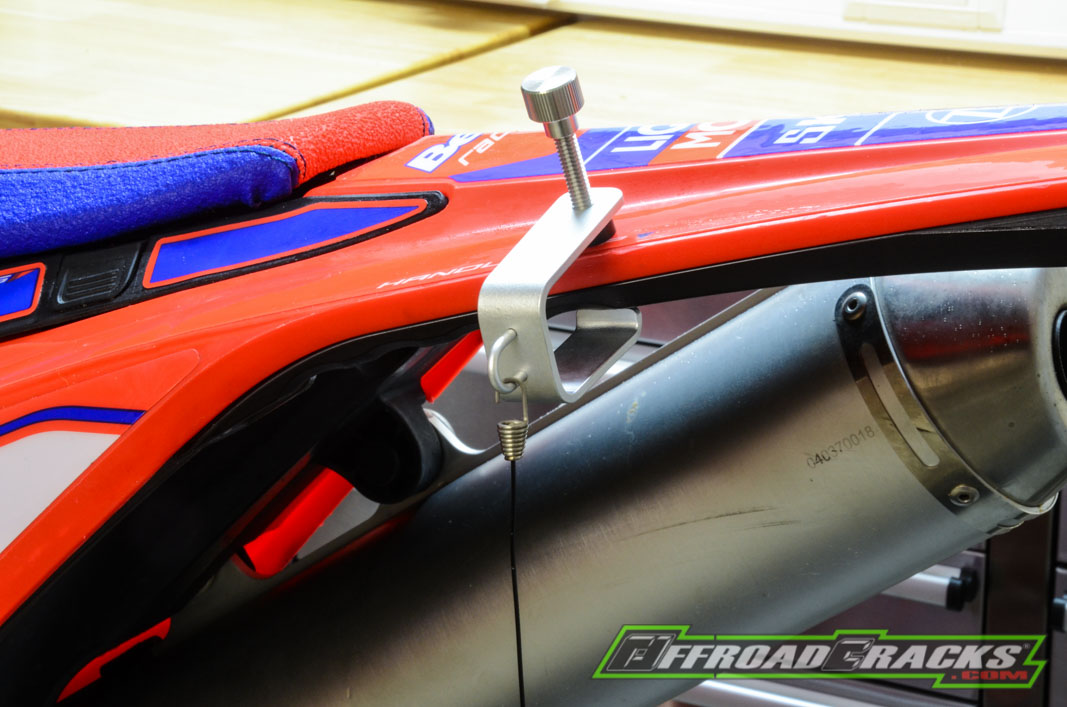
Hier nun die Messung mittels Motool: Der Slacker wird mittig auf der Achse platziert, was relativ schnell durch einen integrierten starken Magneten realisiert werden kann. Anschließend wird in der Senkrechte zum Gerät ein zweiter Punkt am Fahrzeugheck ausgewählt. Dieser wird entweder mit der im Lieferumfang befindlichen Klemmvorrichtung, den aufklebbaren Ösen oder einem selbst gebohrten Loch für wiederkehrende Messungen festgelegt. Dann wird das ausziehbare Stahlseil mit Haken am Heck eingehängt und der Slacker V4 genullt.
Jetzt erfolgt Messung Nummer zwei mit dem Eigengewicht der Enduro belastet. Anschließend wird sie auf den Hubständer positioniert, so dass das Federbein vollkommen ausfedern kann. Jetzt ist ein neuer Wert auf dem Slacker V4 erkennbar, der die Differenz zwischen beiden Zuständen anzeigt.
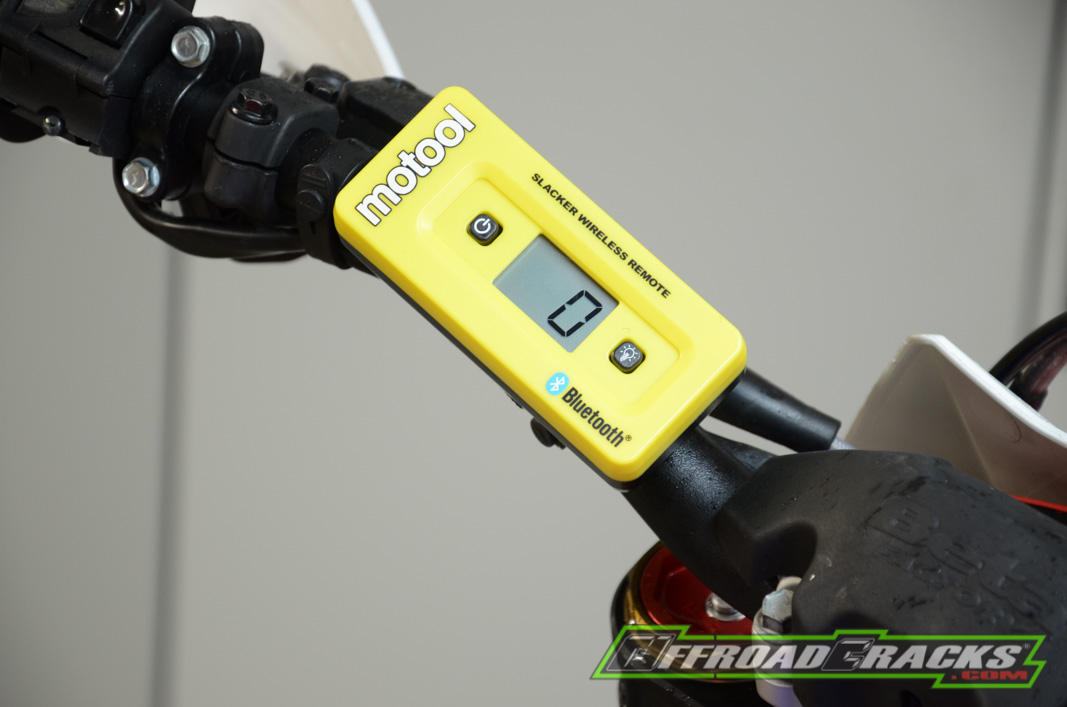
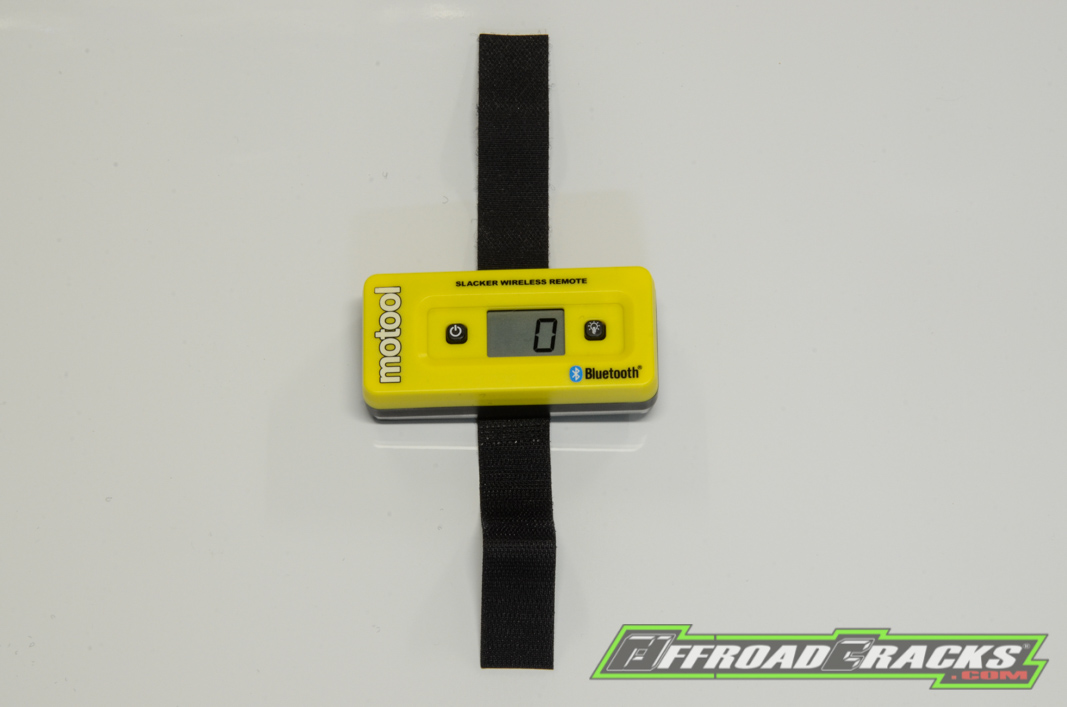
Die dritte Messung erfolgt auf gleiche Weise mit Fahrer und kompletter Ausrüstung. Doch zuvor wird die Wireless Remote Einheit am Lenker mittels Klettband angebracht und eingeschaltet, so dass beim Platznehmen auf der Enduro das Ergebnis auch auf der Einheit am Lenker sichtbar wird. Korrekturen an der Federvorspannung können bei völliger Entlastung bis zum Erreichen des gewünschten Wertes durchgeführt und anschließend nur durch Platznehmen schnell wieder überprüft werden.
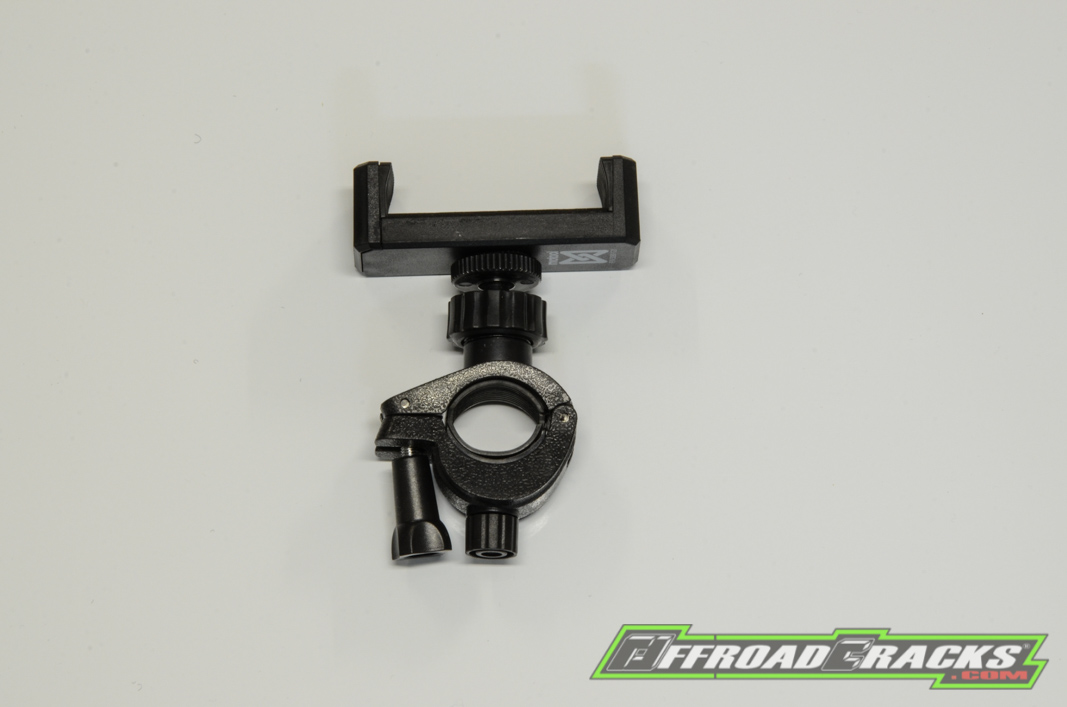
Wer sich die Zusatzkosten für die Wireless Remote-Einheit sparen möchte, kann auch auf die bereits erwähnte kostenlose Motool-App zurückgreifen. Möchte man noch komfortabler arbeiten, dann kann man sich außerdem noch einen Handyhalter für den Lenker zulegen, den es dann für schmale 13 US-Dollar Aufpreis gibt.
Mit dem Motool-Slacker V4 samt Zubehör lässt sich der aufwendige Mess-Prozess per Meterstab und einer zweiten Person auf ein Minimum reduzieren, was ein enormer Vorteil für die schnell Überprüfung des so wichtigen Negativ-Federwegs ist. Zumal sich die Federbein-Feder also auch Gabelfedern über einen gewisse Nutzungsdauer noch setzen und auch nachlassen können, so dass wiederkehrende Messung für ein stets perfektes Fahrwerks-Setup notwendig werden. Auf Grund der einfachen Handhabung und des vergleichsweise dafür akzeptablen Anschaffungspreis können wir den Motool Slacker V4 uneingeschränkt empfehlen. Zumal er sowohl für das Mountainbike, dem Adventure-Bike, das Crossgerät bis hin zum Straßen-Motorrad nutzbar ist.

QUELLE
![]()
PREISE & INFOS
- Motool Slacker V4 $160
- Motool Slacker V4 Wireless Remote $ 30
- Motool Slacker Ballistic Nylon Tasche $ 30
- Motool Slacker V4 Smartphone Bar Mount $ 13
- 2 Jahre Garantie
- 30-Tage-Geld-zurück-Garantie
![]()
Who doesn’t want two more hands when measuring and adjusting the sag at the rear suspension? Here is the solution of Motool from California.
Regardless of whether it is a large adventure bike or sports enduro. Only a properly adjusted suspension ensures the right driving pleasure. Ultimately, this means not only adjusting the compression and rebound damping on the fork and shock absorber, but having also the correct sag. Of course, the one on the fork is not unimportant, but this usually has to be implemented with internal changes using preload bushs, if extensive adjustment from the outside by using existing preload adjuster is not possible.
That is why we are mainly concentrating on the adjustment of the shock absorber, the necessary spring preload and the resulting sag.
Before carrying out this test and adjustment work, it must be ensured that the bearings of the pivot points and the progressive linkage function correctly. This means that the bearings are neither corroded nor stiff. Everything should be well greased to ensure correct function, measurement and adjustment.
Explanation of the term: The negative travel describes the distance between the rear fender of the motorcycle and the swing arm in a loaded and unloaded state. When the shock absorber is fully extended – the Enduro stands on the main or separate lift stand – the maximum distance is determined. It is important to measure the vertical distance between a point on the swing arm and the rear fender of the vehicle. We recommend the center of the rear wheel axle and a point on the rear fender of the vehicle as shown in the picture below.
As a second measurement, the negative travel is to be determined by the weight of the enduro itself. This means that the Enduro stands on both wheels and the measurement is carried out again using identical points. The third important measurement is to be carried out with the driver and his ready to race gear. This means that in addition to the vehicle’s own weight, under the same conditions, the enduro will be loaded with the driver’s weight including the whole gear and the feet on the footrests, so that the measurement can be carried out again at identical points.
The difference between the first and second measurement results is the unloaded negative travel and between the first and third measurement gives the loaded negative travel.
To be able to take the third measurement with a tape measure, you normally need two more hands if you are sitting on the Enduro yourself. And this is where the patented Slacker V4 from Motool comes into play, which, by the way, is used by many factory teams. Because it virtually replaces the additional hands required by a helping person via a digital measuring unit including Bluetooth transmission to an external display on the handlebar or via free Motool app to your smartphone.
In this way, the negative travel for the respective conditions can be checked relatively quickly and easily and, if necessary, adjusted, which is described in the manufacturer’s operating manuals with explicit setting values. At the same time, these measurements can also be used to determine whether the installed spring rate based on the manufacturer’s specifications is sufficient or not for the rider’s weight and for adventure bikes plus its additional weight.
Here is the measurement using Motool: The slacker is placed in the middle of the rear axles, which can be achieved relatively quickly using the integrated strong magnet. A second point on the rear of the vehicle is then selected vertical to the device. This is fixed either with the clamping device included in the scope of delivery, the adhesive eyelets or a self-drilled hole for recurring measurements. Then the extendable steel cable is hooked into the snag and the Slacker V4 has to be reset to zero.
Now measurement number two takes place with the weight of the Enduro loaded. Then it is positioned on the lift stand so that the shock absorber can rebound completely. A new value can now be seen on the Slacker V4, which shows the difference between the two states.
The third measurement is carried out in the same way with the driver and complete equipment. But first, the wireless remote unit is attached to the handlebars using Velcro and switched on so that when you sit down on the enduro, the result is also visible on the unit on the handlebars. Corrections to the spring preload can be carried out with complete relief until the desired value is reached and then quickly checked again by simply sitting down.
If you want to save the additional costs for the wireless remote unit, you can also use the free Motool app mentioned above. If you want to work even more comfortably, you can also get a mobile phone holder for the handlebar, which is then available for a small surcharge of 13 US dollars.
With the Motool-Slacker V4 and its accessories, the time-consuming measuring process using a tape measure and a second person can be reduced to a minimum, which is an enormous advantage for quickly checking the all-important sag. Especially since the shock spring and fork springs can still settle and also wear off over a certain period of use, so that recurring measurements are necessary for an always perfect suspension setup. Due to the simple handling and the comparatively acceptable purchase price, we can unreservedly recommend the Motool Slacker V4. Especially since it can be used for mountain bikes, adventure bikes, dirtbikes and road motorcycles as well.
SUPPLIER
![]()
Prices & informations
- Motool Slacker V4 $160
- Motool Slacker V4 Wireless Remote $ 30
- Motool Slacker Ballistic Nylon bag $ 30
- Motool Slacker V4 Smartphone Bar Mount $ 13
- 2 years warranty
- 30 days cash back guarantee


: Josep Garcia wins his 3rd World Championship!")


